Create a project
A project bundles applications, the shared folder in SCS Drive, and the team. Every application belongs to a project. You are the owner.
On Projekte, Projekt anlegen is at the top. The same button is the plus next to Projekte in the sidebar.
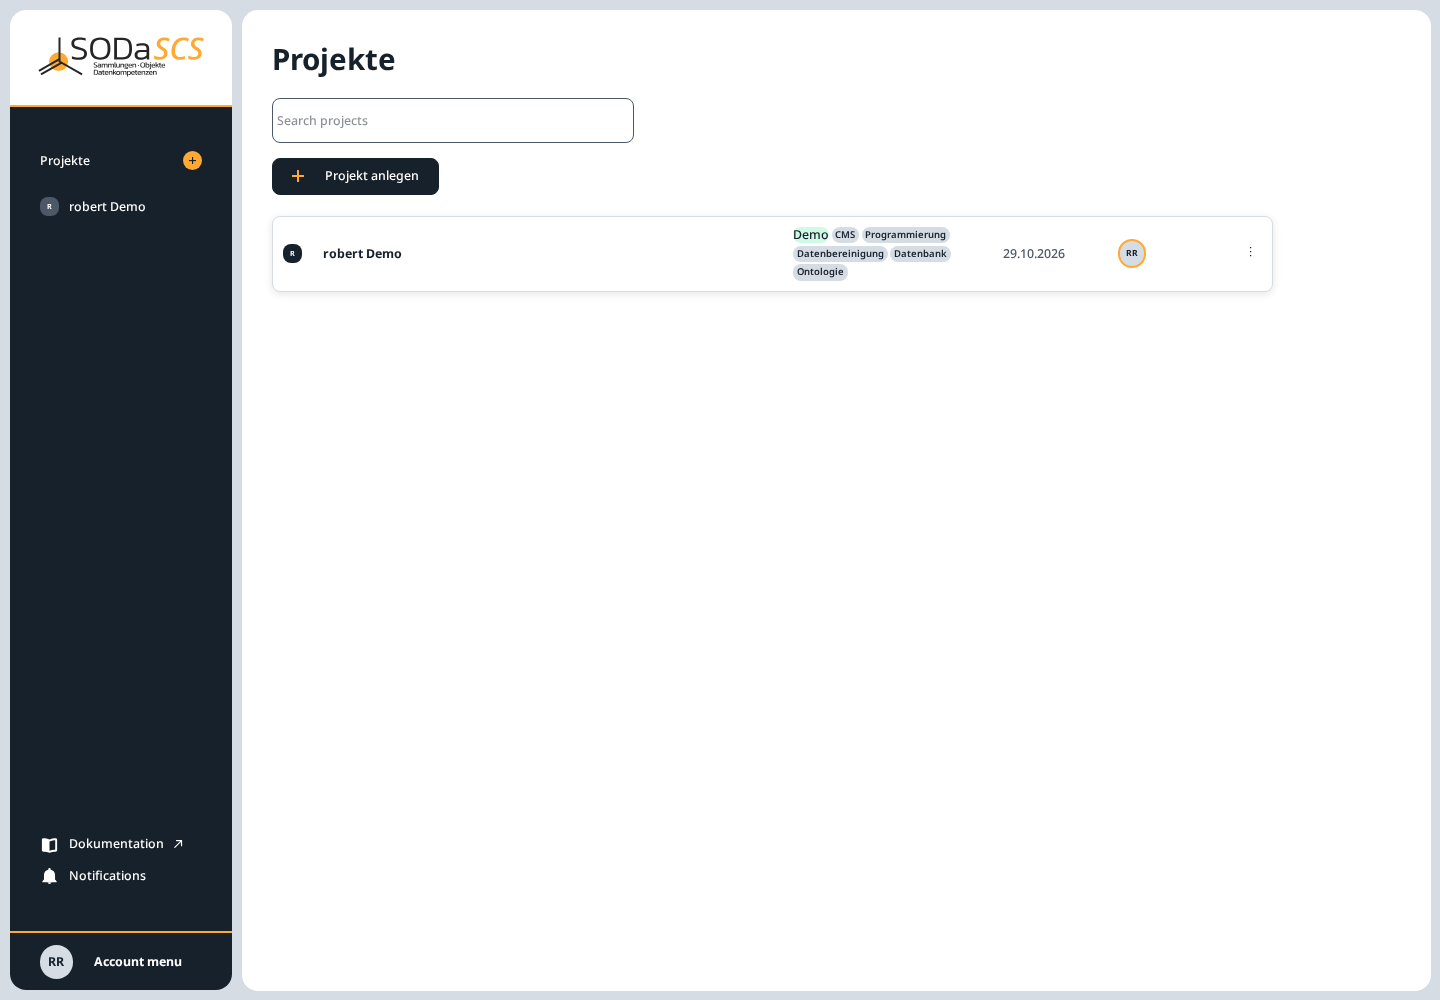
The card shows the name, tags of the applications inside, the date, and your initials. A click on the card opens the project.
Wizard
Projekt anlegen opens a wizard. Nothing is saved until you choose Projekt anlegen on the last page. Closing the window before that discards everything.
How many steps you see depends on whether you select applications. Without applications there are four steps. Each selected application adds a step for naming it.
1. Name and note
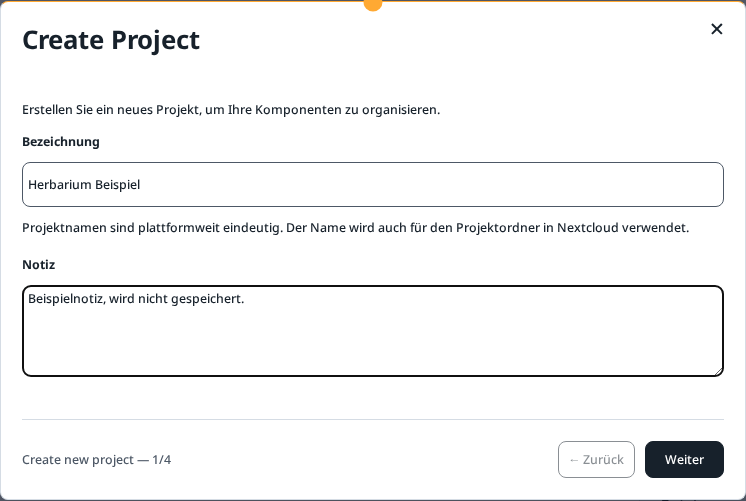
- Bezeichnung is the project name. It must be unique across the platform, and it becomes the name of the project folder in Nextcloud.
- Notiz is free text. It shows later on the project page.
Weiter goes to the next step. ← Zurück is disabled on the first page.
2. Choose applications
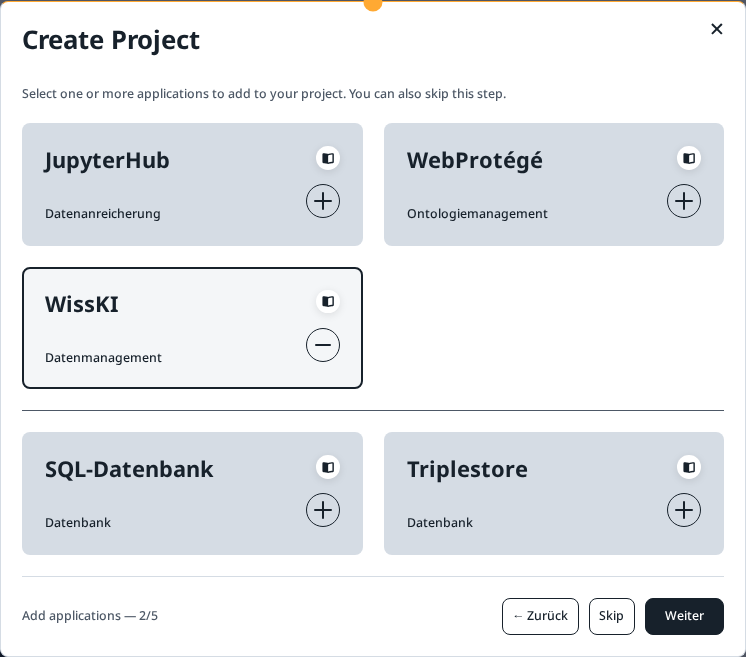
Select one or more cards. A second click clears the selection. Skip, or Weiter with nothing selected, leaves the project without applications. You can add applications later on the project page.
| Application | For | How often |
|---|---|---|
| JupyterHub (Datenanreicherung) | Notebooks and computing, the project's shared folder | once per project |
| WebProtégé (Ontologiemanagement) | the project's ontology | once per project |
| WissKI (Datenmanagement) | an environment for collection data, with its own database and triplestore | more than once |
| SQL-Datenbank (Datenbank) | your own relational database, in addition to WissKI | more than once |
| Triplestore (Datenbank) | your own triplestore, in addition to WissKI | more than once |
The book icon on a card opens the short help for that application.
3. Name the application
If you selected at least one card, a form follows for each.
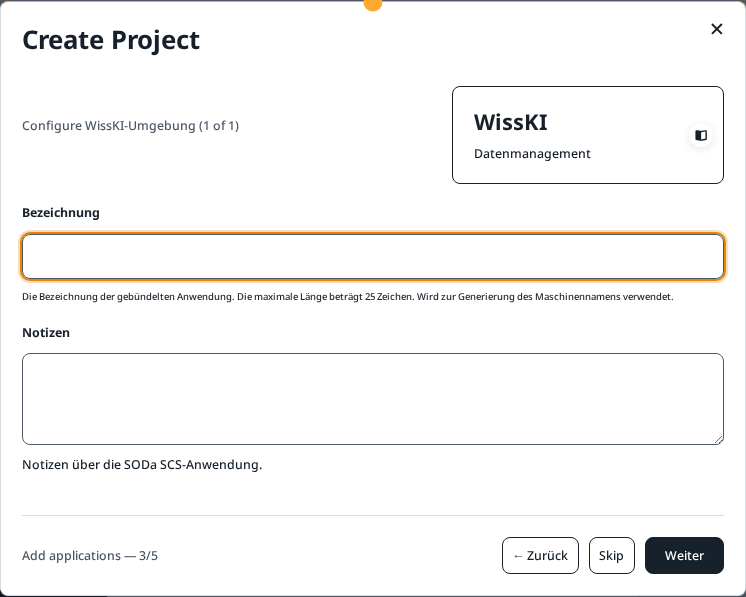
For WissKI and JupyterHub the Bezeichnung is at most 25 characters. The application address is built from it and appears under the field once the name has been checked. Notizen are optional. Skip drops this one application. Weiter keeps it for the check at the end.
SQL database and triplestore ask for a label and notes in the same way. A WissKI environment already includes a database and a triplestore. The two cards below those are extra, standalone applications.
4. Invite people
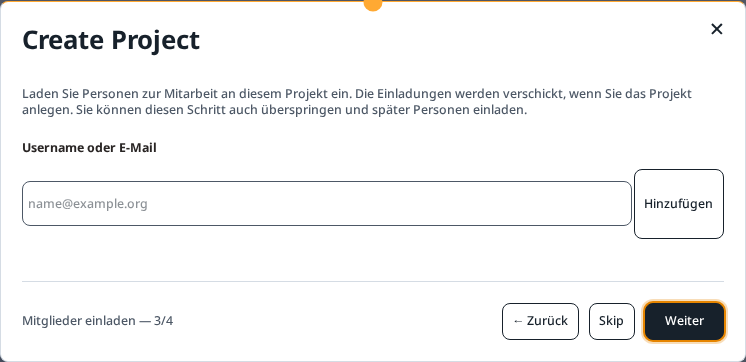
Enter the Username oder E-Mail of someone who already has an SCS account, and choose Hinzufügen. The invitation is sent only when you actually create the project. You can pass the step with Skip or with Weiter and an empty field, and invite people later on the project page. How they accept is described in Project members.
5. Check and create
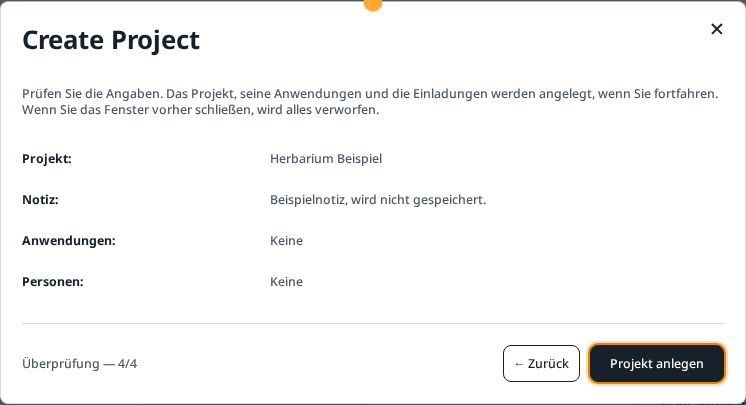
The check lists name, note, applications, and people. In the picture, applications and people are empty because both steps were skipped. If you selected any, they are listed here.
Projekt anlegen creates the project, starts the selected applications, and sends the invitations. WissKI needs several minutes for that. The project page shows progress on the cards (Läuft, Startet, Gestoppt).
Demo project
When your account is approved you get a demo project. It is created on the first sign-in, already during the introduction, and you do not choose it. It includes WissKI, JupyterHub, and WebProtégé, with sample data. Setup takes a few minutes. There is no second demo project per account. You still create a project of your own with Projekt anlegen.
The result looks like this:
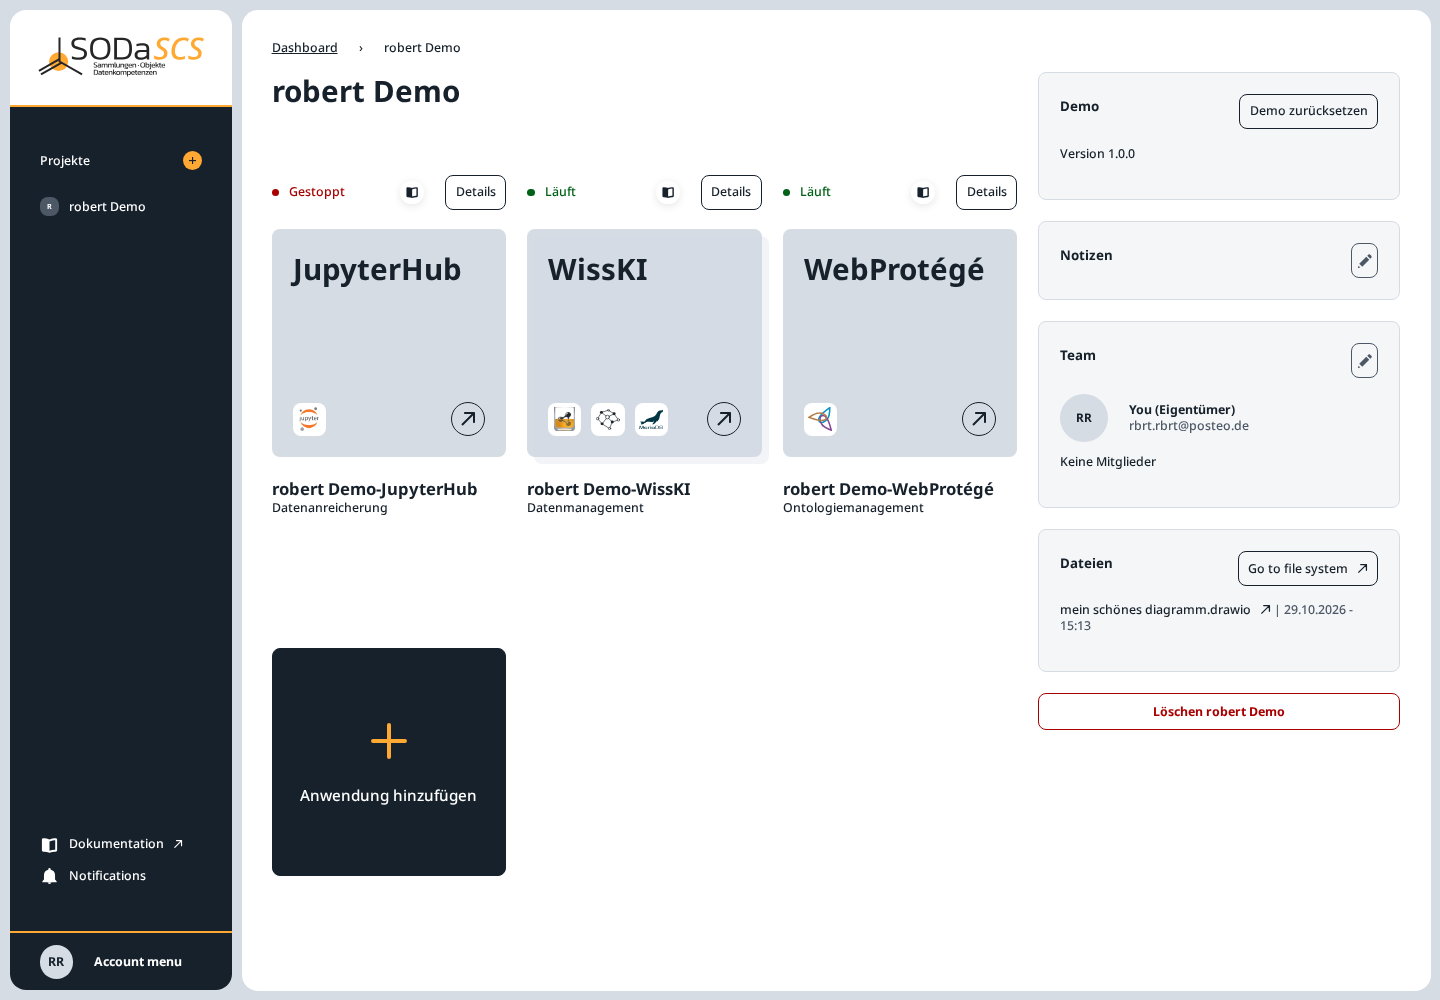
At the top right are the status Demo, the version, and Demo zurücksetzen.
Reset the demo
Reset overwrites every change in the WissKI, the databases, the triplestores, the Jupyter home directory, the team folder, and the WebProtégé ontology of this project with the demo data. Applications you added yourself stay. This cannot be undone.